Dear Community,
We've heard your feedback and are excited to introduce Base as the latest extension to our PancakeSwap ecosystem! Expanding our multichain offerings, Base PancakeSwap is launching with both Swap and Liquidity Provisioning features immediately available. For your convenience, we've crafted a detailed step-by-step guide that covers all the essentials—from Bridging to Swap and Liquidity Provisioning.
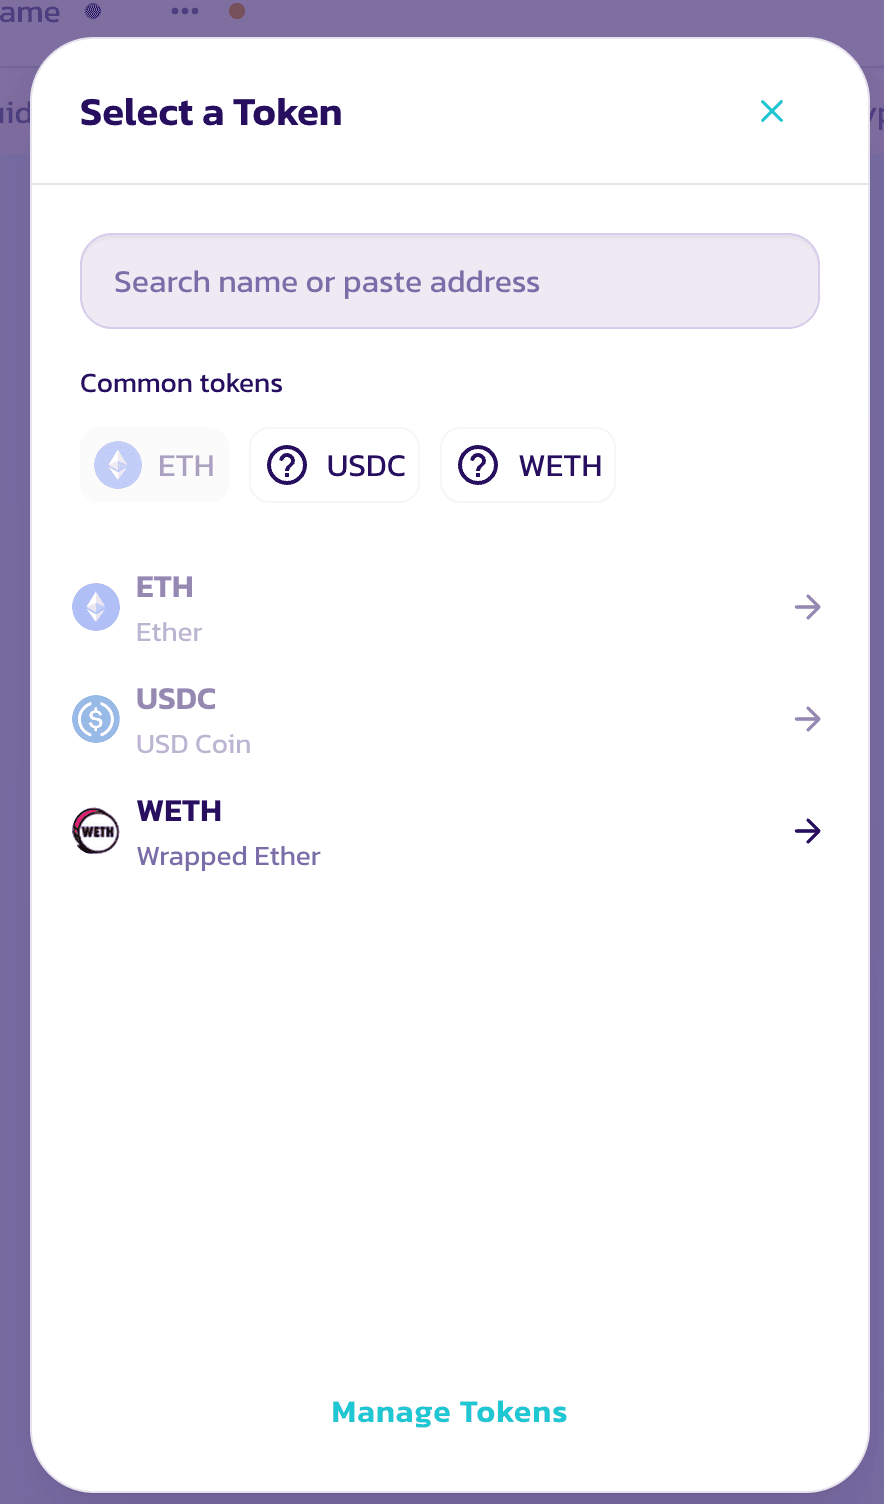
How to connect your wallet on Base PancakeSwap
Go to the top-right corner of your screen, choose Base, and click "Connect Wallet". For those using browser extension wallets, you only need to select your wallet's icon and follow the instructions in the pop-up window.

If you need to transfer assets from other chains to Base, please kindly visit here for the bridging instructions: https://blog.pancakeswap.finance/articles/how-to-bridge-tokens-from-eth-mainnet-to-Base
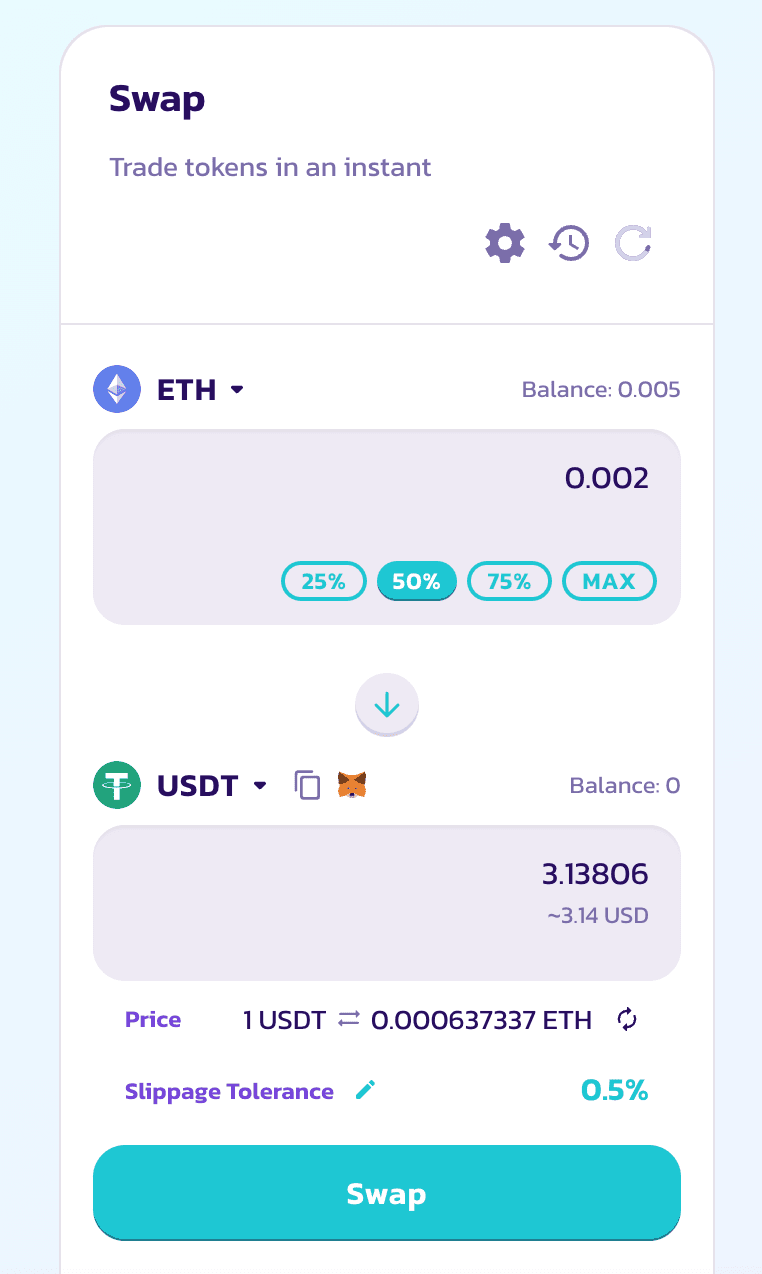
Swap on PancakeSwap v3 After Connecting to Base
1. Choose the specific tokens you want to exchange and input the quantity.
2. Review all transaction information carefully. If everything looks good, press "Swap" to continue.
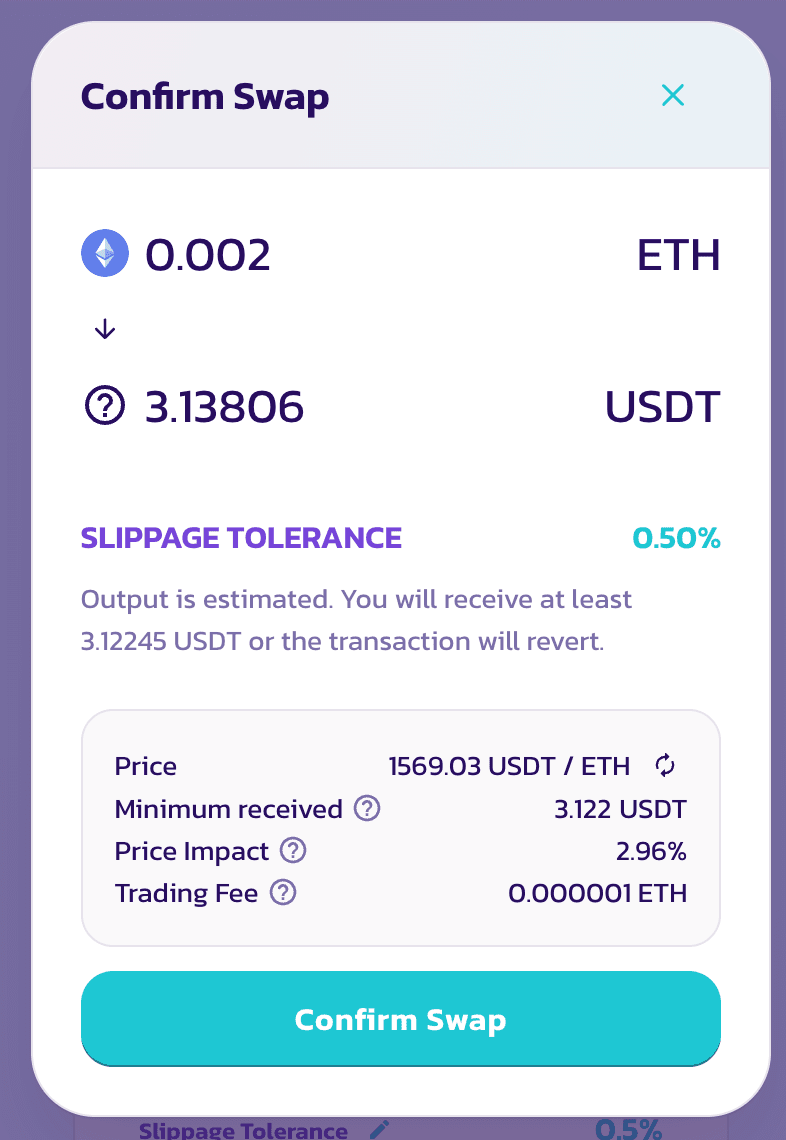
3.A prompt for "Confirm Swap" will appear. Review the details again for accuracy.
4. If all details are correct, proceed by clicking on the "Confirm Swap" button.
5. Your wallet will request one final transaction confirmation. Confirm to complete the process.
Add/Remove Liquidity in PancakeSwap v3 After Connecting to Base
In v3, liquidity providers can focus their liquidity within a specific price range, allowing them to receive an equivalent amount of trading fee but with less capital committed to the liquidity pools. Also, providers can select from one of four trading fee tiers: 0.01%, 0.05%, 0.25%, and 1%. This feature is now available on Base!
1. After connecting to Base at the top right corner, navigate to the Liquidity page and select the "Add Liquidity" button.

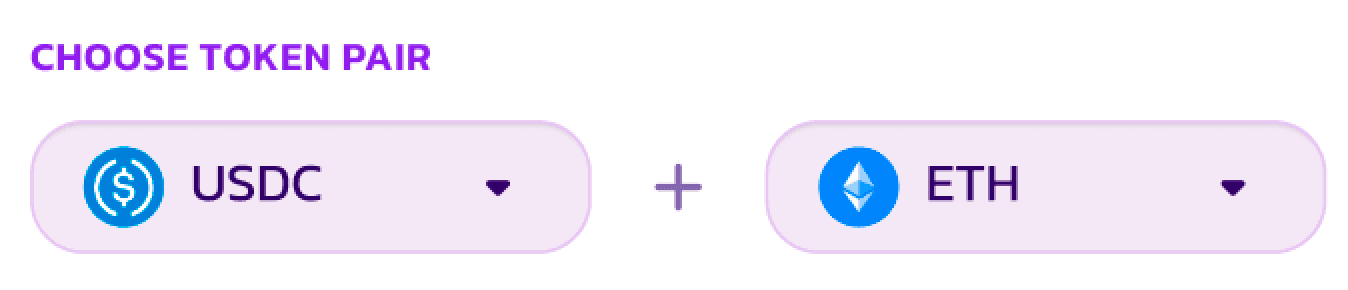
2. Choose the two tokens that will make up the trading pair for which you intend to add liquidity. In this example, we will use ETH and USDC.
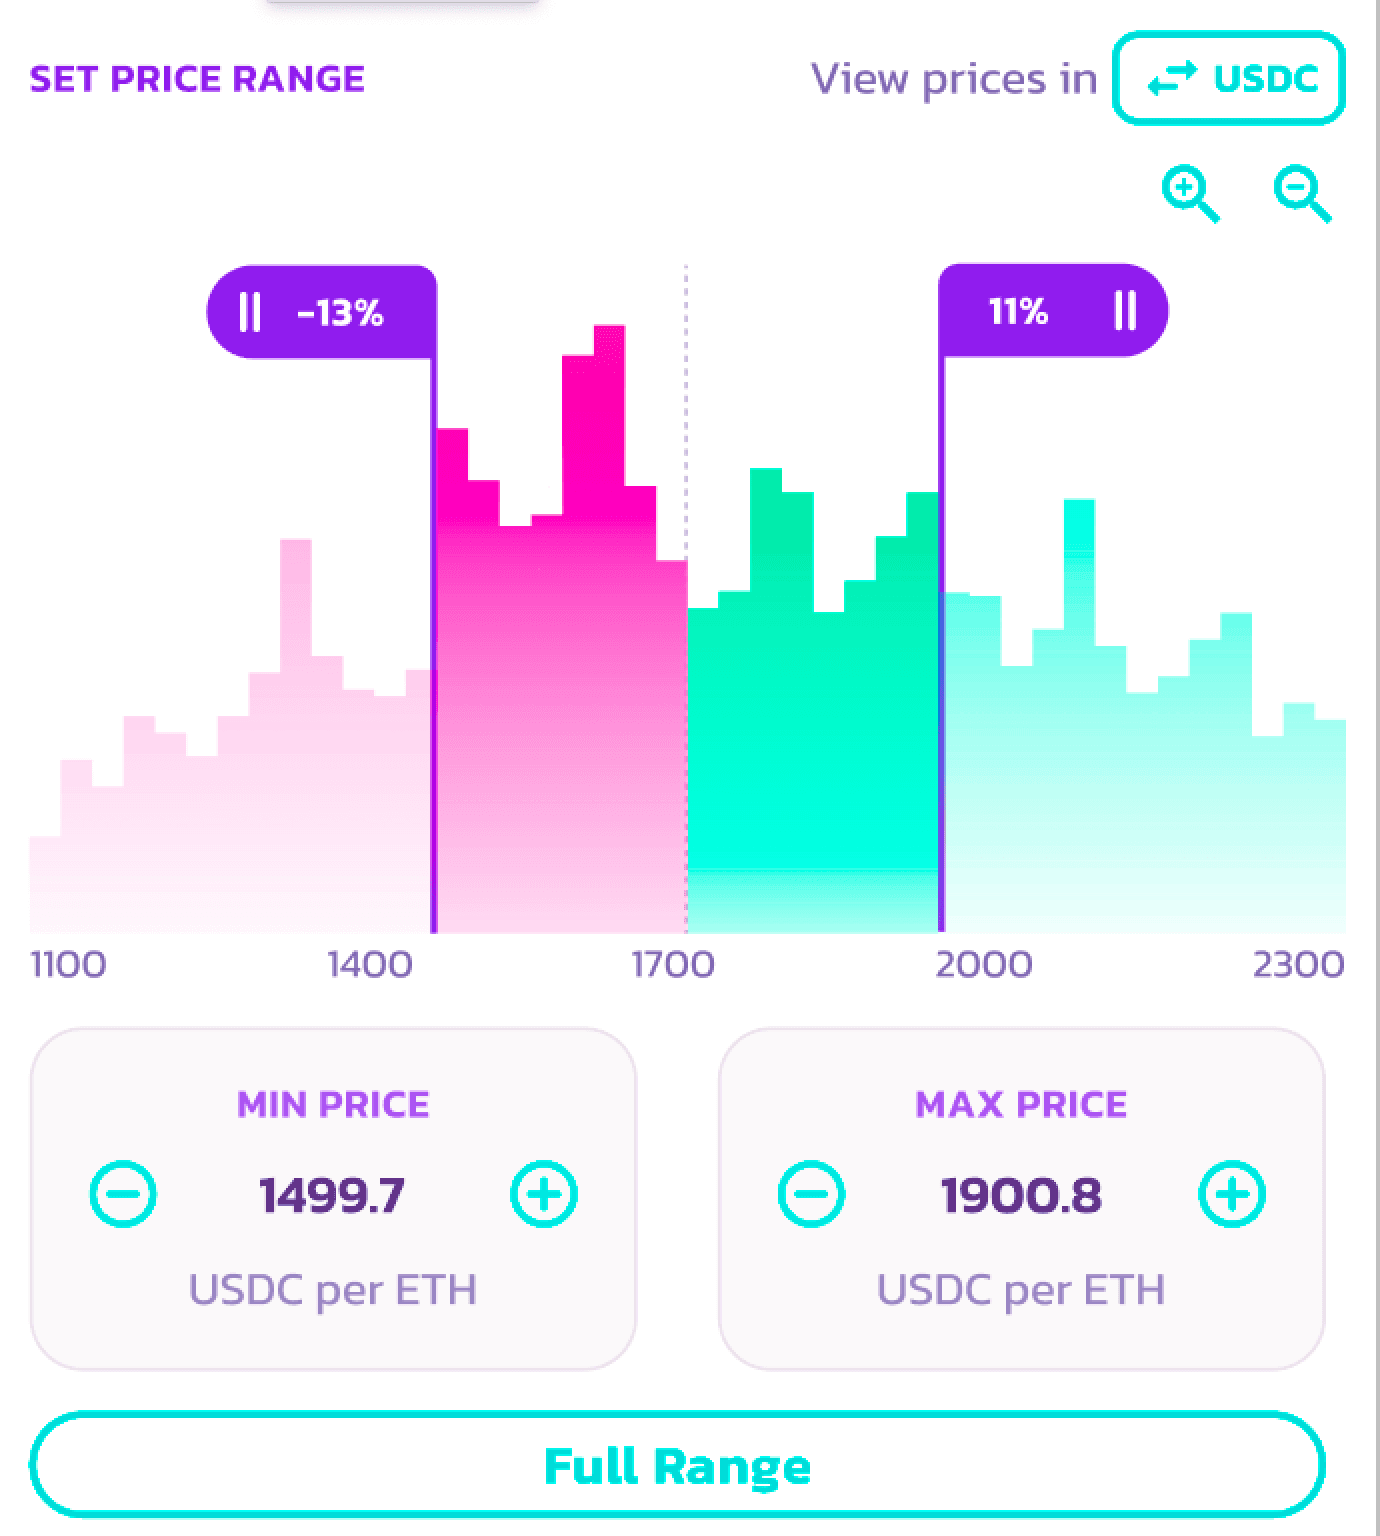
3. The system will automatically select the most widely-used trading fee tier and set your price range.
4. Ensure that you are adding v3 liquidity by checking for the "v3 LP" label.
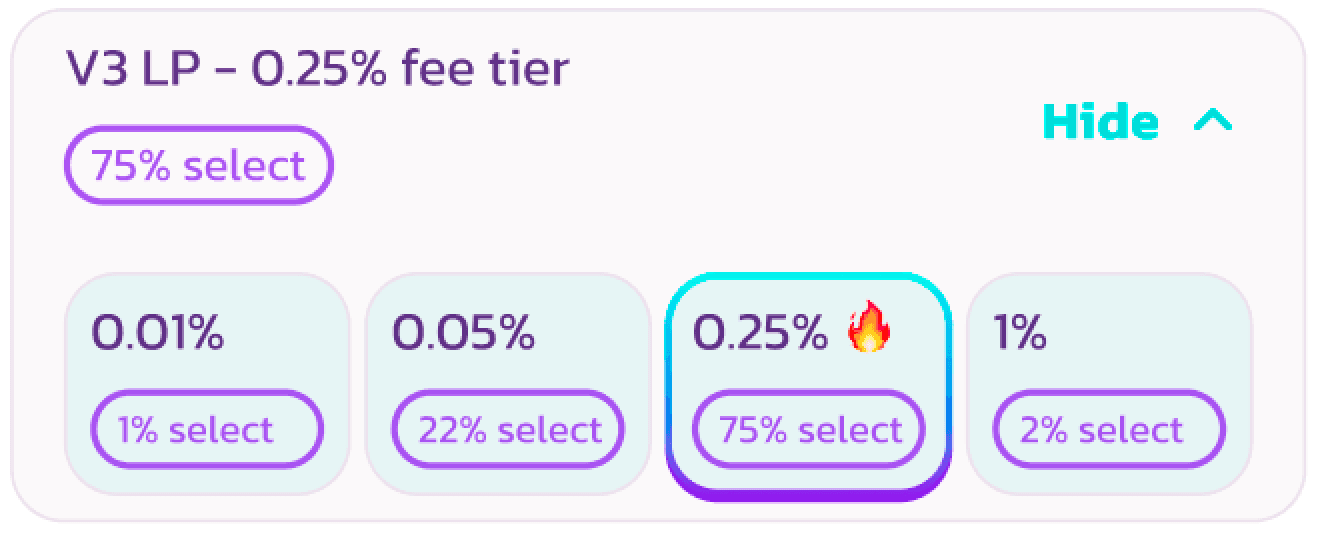
5. The price range can be reviewed on the right side of the display. Adjustments can be made as needed. Please select an appropriate fee tier, as positions that are out-of-range will not generate trading fees.
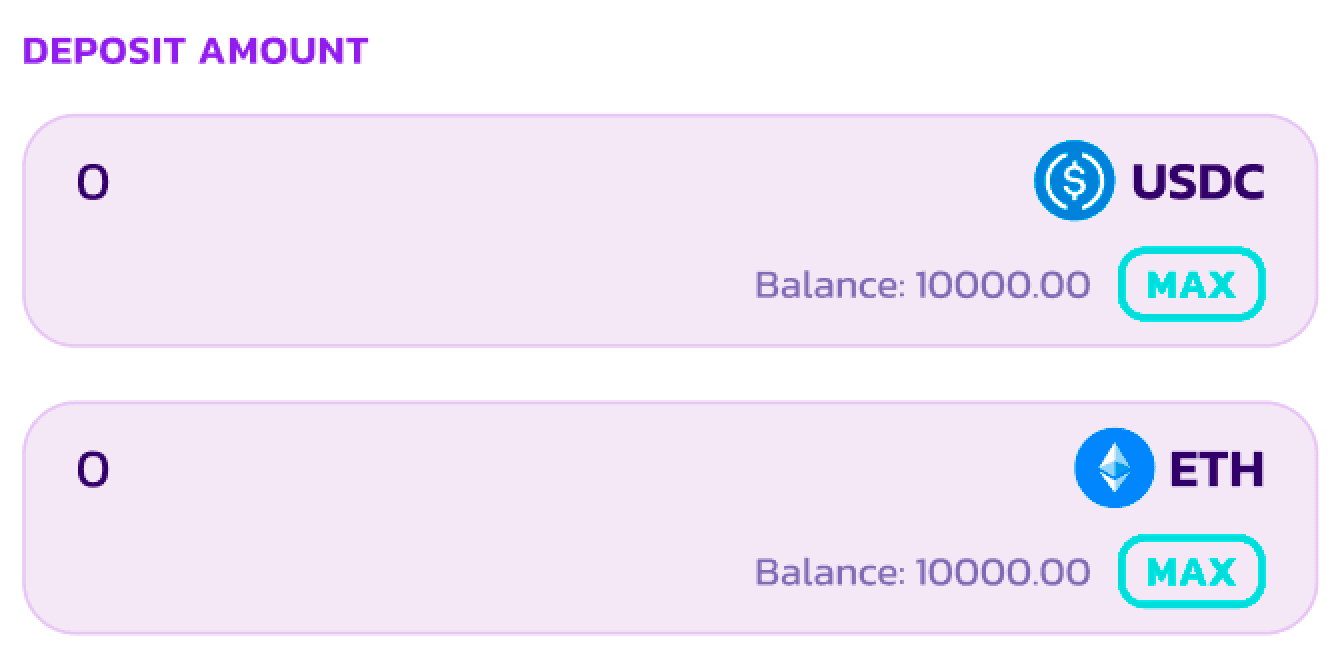
6. Enter a specific amount for one of the tokens in the "Deposit Amount" field, or simply use the "MAX" button for convenience.
7. Click on the "Enable" button. If you add liquidity with tokens other than ETH, both tokens need to be enabled.

8. After completing these steps, the "Add" button will become active. Click on it to move forward.
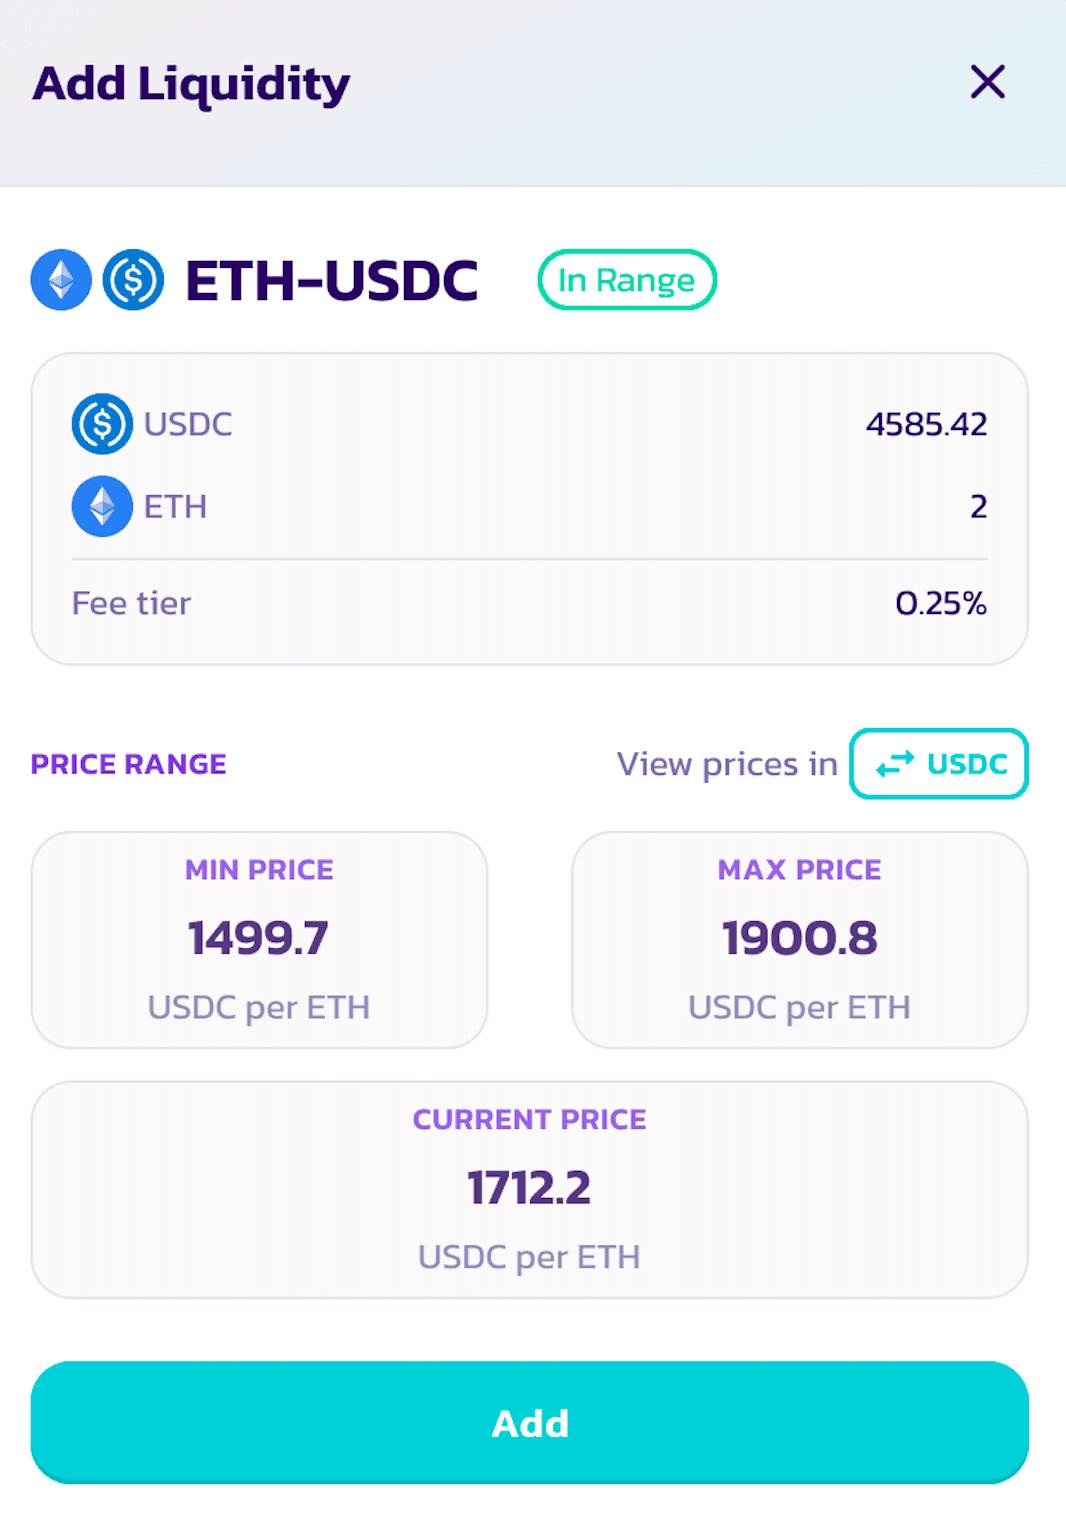
9. A pop-up window will appear, providing a preview of your liquidity position. Review the details, and if everything is accurate, click "Add" once more to continue.
10. Your new liquidity position will be displayed on the "My Liquidity" page. Click on it to view the details.
How to Remove Liquidity
1. Navigate to the Liquidity page and select the "Add Liquidity" button. 2. Identify the position from which you wish to remove liquidity under the "Your Liquidity" section, and select it. 3. Select the "Remove" option. A new window will subsequently appear. 4. Utilize either the buttons or the slider to determine the amount of liquidity you intend to withdraw. If you desire to remove all liquidity, simply select the "MAX" option. 5. As a result of this action, you will receive both tokens from your pair. The value of your remaining liquidity will be updated accordingly.
Explore our comprehensive set of features, meticulously crafted to elevate your trading and liquidity management experiences! The excitement continues with our "Traverse" expedition, part of the Base island campaign on Galxe. This thrilling seven-week adventure is scheduled from August 31, 2023, at 13:00 UTC, through to October 19, 2023, at 13:00 UTC. Join the Traverse campaign and discover the incredible treasures hidden for you to find!
🗺️ Happy adventure!
The Chefs 🥞